Climb the ranked ladder faster with our definitive breakdown of free fire best characters, active skill balances, and elite combat loadouts for Grandmaster in 2026.
Selecting the right squad lineup in Free Fire feels completely different this year. System patches OB52 and OB53 rearranged the competitive hierarchy, punishing passive campers while rewarding decisive entry fraggers. Relying on dated ability profiles from past seasons directly bleeds rank points in every lobby.
Character progression no longer forces you through level-gated skill upgrades. Operatives now deploy at maximum mechanical power immediately upon unlock. You also get 5 customizable preset slots to toggle between Battle Royale setups and aggressive Clash Squad builds. The deciding factor is mastering how recent nerfs and reworks change duel timings.
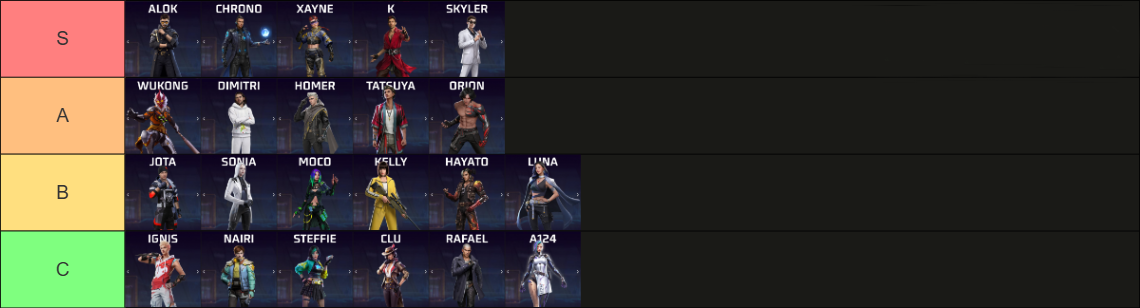
The S-Tier Meta: Strongest Character in Free Fire Right Now
Balance updates pushed the competitive baseline away from passive reconnaissance toward explosive engagements. The current meta belongs strictly to operators who either guarantee an instant health advantage during an active trade or lock down physical combat space.
Ray
Introduced in OB53, Ray dominates Solo Ranked and squad pushes. His active skill, Bond of Eclipse, tracks opposing players through walls and triggers an execution mechanic when targets fall below a critical health threshold. Scoring that execution provides an instant cooldown reset and immediate HP regeneration. This reset chain makes Ray the premier pick for frontline sweepers who refuse to let tagged opponents reset behind cover.
DJ Alok
Alok remains a constant in competitive play. Drop the Beat generates a 5-meter aura boosting teammate movement speed by 15% while restoring 3 HP per second for 10 seconds on a 45-second cooldown. While older guides claim a 5 HP per second burst over 5 seconds, official Garena patch notes confirm the sustained 3 HP per second over 10 seconds. That 30 HP buffer and rotation speed keep Alok viable in every squad mode.
Xayne
Xayne surged in utility following OB52. Garena increased her active ability's temporary shield points from 50 to 70 and extended skill duration to 15 seconds. If you push fortified compounds, Xayne supplies the durability needed to out-trade high-damage weapons without sacrificing base HP.
Orion
Orion replaces the standard EP gauge with 300 Crimson Energy. Crimson Crush consumes 150 energy to provide 3 seconds of damage invulnerability. You cannot fire weapons during the effect, but you drain 15 HP from enemies within 5 meters. Supported by a 3-second cooldown, an Orion player managing their energy pool survives crossfires that wipe standard builds.
| Character | Skill Name | Skill Type | Cooldown / Cost | Core Competitive Value |
|---|---|---|---|---|
| Alok | Drop the Beat | Active | 45s Cooldown | 15% team speed buff, 3 HP/s healing for 10s (5m radius) |
| Xayne | Xtreme Encounter | Active | Standard Cooldown | 70 temporary shield HP lasting 15s; breaks enemy defenses |
| Orion | Crimson Crush | Active | 3s Cooldown (150 EP) | 3s total invulnerability, drains 15 HP within 5m |
| Kenta | Swordsman's Wrath | Active | 70s Cooldown | 5m frontal shield blocking 60% damage (20% while firing) for 5s |
| Tatsuya | Rebel Rush | Active | 90s Cooldown (OB52 rule) | Rapid multi-charge forward dashes for positioning |
The data above details active parameters confirmed across recent balance patches, highlighting how frontline survivability dominates the upper tier.

Free Fire
110 Diamonds
 110 DiamondsUSD 0.87Buy Now
100+10 Diamonds
100+10 DiamondsUSD 0.79Buy Now231 Diamonds
231 DiamondsUSD 1.75Buy Now210+53 Diamonds
210+53 DiamondsUSD 1.85Buy Now210 Diamonds
210 DiamondsUSD 1.97Buy Now310 Diamonds
310 DiamondsUSD 2.48Buy Now355 Diamonds
355 DiamondsUSD 2.32Buy Now310+31 Diamonds
310+31 DiamondsUSD 2.38Buy Now520 Diamonds
520 DiamondsUSD 4.15Buy Now470+47 Diamonds
470+47 DiamondsUSD 4.07Buy Now520+52 Diamonds
520+52 DiamondsUSD 3.68Buy Now583 Diamonds
583 DiamondsUSD 4.36Buy Now530+133 Diamonds
530+133 DiamondsUSD 4.61Buy Now720 Diamonds
720 DiamondsUSD 4.62Buy Now530 Diamonds
530 DiamondsUSD 4.96Buy Now1060 Diamonds
1060 DiamondsUSD 8.17Buy Now1188 Diamonds
1188 DiamondsUSD 8.73Buy Now1060+106 Diamonds
1060+106 DiamondsUSD 7.90Buy Now1080+270 Diamonds
1080+270 DiamondsUSD 9.21Buy Now956+96 Diamonds
956+96 DiamondsUSD 9.27Buy Now1450 Diamonds
1450 DiamondsUSD 9.24Buy Now1080 Diamonds
1080 DiamondsUSD 9.87Buy Now1637+164 Diamonds
1637+164 DiamondsUSD 13.48Buy Now2180 Diamonds
2180 DiamondsUSD 16.50Buy Now2420 Diamonds
2420 DiamondsUSD 17.45Buy Now2180+218 Diamonds
2180+218 DiamondsUSD 15.44Buy Now2200+550 Diamonds
2200+550 DiamondsUSD 18.43Buy Now2200 Diamonds
2200 DiamondsUSD 19.75Buy Now3640 Diamonds
3640 DiamondsUSD 23.11Buy Now3361+337 Diamonds
3361+337 DiamondsUSD 30.91Buy Now5600 Diamonds
5600 DiamondsUSD 40.85Buy Now5600+560 Diamonds
5600+560 DiamondsUSD 36.85Buy Now7290 Diamonds
7290 DiamondsUSD 45.83Buy Now11500 Diamonds
11500 DiamondsUSD 77.41Buy Now36500 Diamonds
36500 DiamondsUSD 230.63Buy Now73100 Diamonds
73100 DiamondsUSD 461.76Buy NowBrazil-310 + 31 Bonus Diamonds
Brazil-310 + 31 Bonus DiamondsUSD 2.36Buy NowBrazil-520 + 52 Bonus Diamonds
Brazil-520 + 52 Bonus DiamondsUSD 3.53Buy NowBrazil-1060 + 106 Bonus Diamonds
Brazil-1060 + 106 Bonus DiamondsUSD 7.57Buy NowBrazil-2180 + 218 Bonus Diamonds
Brazil-2180 + 218 Bonus DiamondsUSD 14.80Buy NowBrazil-5600 + 560 Bonus Diamonds
Brazil-5600 + 560 Bonus DiamondsUSD 35.30Buy NowCIS-100 Diamonds
CIS-100 DiamondsUSD 0.77Buy NowCIS-Weekly Membership
CIS-Weekly MembershipUSD 1.55Buy NowCIS-310 Diamonds
CIS-310 DiamondsUSD 2.28Buy NowCIS-520 Diamonds
CIS-520 DiamondsUSD 3.74Buy NowCIS-Monthly Membership
CIS-Monthly Membership USD 5.45Buy NowCIS-1060 Diamonds
CIS-1060 DiamondsUSD 7.46Buy NowCIS-2180 Diamonds
CIS-2180 DiamondsUSD 14.82Buy NowCIS-5600 Diamonds
CIS-5600 DiamondsUSD 38.18Buy NowEurope-100 Diamonds
Europe-100 DiamondsUSD 0.96Buy NowEurope-Weekly Membership
Europe-Weekly MembershipUSD 1.63Buy NowEurope-310 Diamonds
Europe-310 DiamondsUSD 2.87Buy NowEurope-520 Diamonds
Europe-520 DiamondsUSD 4.78Buy NowEurope-Monthly Membership
Europe-Monthly MembershipUSD 7.62Buy NowEurope-1060 Diamonds
Europe-1060 DiamondsUSD 9.55Buy NowEurope-2180 Diamonds
Europe-2180 DiamondsUSD 19.09Buy NowEurope-5600 Diamonds
Europe-5600 DiamondsUSD 45.50Buy NowGlobal-Weekly Membership
Global-Weekly Membership USD 1.62Buy NowGlobal-310 Diamonds
Global-310 DiamondsUSD 2.56Buy NowGlobal-530 Diamonds
Global-530 DiamondsUSD 4.33Buy NowGlobal-520 Diamonds
Global-520 DiamondsUSD 4.59Buy NowGlobal-Monthly Membership
Global-Monthly MembershipUSD 7.59Buy NowGlobal-1060 Diamonds
Global-1060 DiamondsUSD 9.17Buy NowGlobal-1080 Diamonds
Global-1080 DiamondsUSD 9.00Buy NowGlobal-2200 Diamonds
Global-2200 DiamondsUSD 17.51Buy NowGlobal-2180 Diamonds
Global-2180 DiamondsUSD 18.23Buy NowGlobal-5600 Diamonds
Global-5600 DiamondsUSD 45.50Buy NowGlobal-11500 Diamonds
Global-11500 DiamondsUSD 91.01Buy NowGlobal Vouchers-210 Diamonds
Global Vouchers-210 DiamondsUSD 1.65Buy NowGlobal Vouchers-530 Diamonds
Global Vouchers-530 DiamondsUSD 4.19Buy NowGlobal Vouchers-1080 Diamonds
Global Vouchers-1080 DiamondsUSD 8.39Buy NowGlobal Vouchers-2200 Diamonds
Global Vouchers-2200 DiamondsUSD 17.40Buy NowIndonesia-120 Diamonds
Indonesia-120 DiamondsUSD 0.87Buy NowIndonesia-125 Diamonds
Indonesia-125 DiamondsUSD 0.92Buy NowIndonesia-130 Diamonds
Indonesia-130 DiamondsUSD 0.97Buy NowIndonesia-140 Diamonds
Indonesia-140 DiamondsUSD 0.91Buy NowIndonesia-145 Diamonds
Indonesia-145 DiamondsUSD 1.02Buy NowIndonesia-150 Diamonds
Indonesia-150 DiamondsUSD 1.06Buy NowIndonesia-160 Diamonds
Indonesia-160 DiamondsUSD 1.17Buy NowIndonesia-170 Diamonds
Indonesia-170 DiamondsUSD 1.26Buy NowIndonesia-180 Diamonds
Indonesia-180 DiamondsUSD 1.36Buy NowIndonesia-190 Diamonds
Indonesia-190 DiamondsUSD 1.36Buy NowIndonesia-200 Diamonds
Indonesia-200 DiamondsUSD 1.45Buy NowIndonesia-210 Diamonds
Indonesia-210 DiamondsUSD 1.37Buy NowIndonesia-Weekly Membershio
Indonesia-Weekly MembershioUSD 1.49Buy NowIndonesia-230 Diamonds
Indonesia-230 DiamondsUSD 1.65Buy NowIndonesia-260 Diamonds
Indonesia-260 DiamondsUSD 1.84Buy NowIndonesia-250 Diamonds
Indonesia-250 DiamondsUSD 1.84Buy NowIndonesia-280 Diamonds
Indonesia-280 DiamondsUSD 1.82Buy NowIndonesia-300 Diamonds
Indonesia-300 DiamondsUSD 2.13Buy NowIndonesia-BP Card
Indonesia-BP CardUSD 2.23Buy NowIndonesia-350 Diamonds
Indonesia-350 DiamondsUSD 2.41Buy NowIndonesia-355 Diamonds
Indonesia-355 DiamondsUSD 2.28Buy NowIndonesia-360 Diamonds
Indonesia-360 DiamondsUSD 2.48Buy NowIndonesia-375 Diamonds
Indonesia-375 DiamondsUSD 2.61Buy NowIndonesia-405 Diamonds
Indonesia-405 DiamondsUSD 2.80Buy NowIndonesia-400 Diamonds
Indonesia-400 DiamondsUSD 2.85Buy NowIndonesia-425 Diamonds
Indonesia-425 DiamondsUSD 2.91Buy NowIndonesia-420 Diamonds
Indonesia-420 DiamondsUSD 2.95Buy NowIndonesia-455 Diamonds
Indonesia-455 DiamondsUSD 3.19Buy NowIndonesia-475 Diamonds
Indonesia-475 DiamondsUSD 3.29Buy NowIndonesia-495 Diamonds
Indonesia-495 DiamondsUSD 3.38Buy NowIndonesia-510 Diamonds
Indonesia-510 DiamondsUSD 3.53Buy NowIndonesia-512 Diamonds
Indonesia-512 DiamondsUSD 3.53Buy NowIndonesia-515 Diamonds
Indonesia-515 DiamondsUSD 3.57Buy NowIndonesia-520 Diamonds
Indonesia-520 DiamondsUSD 3.63Buy NowIndonesia-545 Diamonds
Indonesia-545 DiamondsUSD 3.76Buy NowIndonesia-565 Diamonds
Indonesia-565 DiamondsUSD 3.87Buy NowIndonesia-600 Diamonds
Indonesia-600 DiamondsUSD 4.20Buy NowIndonesia-635 Diamonds
Indonesia-635 DiamondsUSD 4.35Buy NowIndonesia-645 Diamonds
Indonesia-645 DiamondsUSD 4.45Buy NowIndonesia-Monthly Membership
Indonesia-Monthly MembershipUSD 4.46Buy NowIndonesia-655 Diamonds
Indonesia-655 DiamondsUSD 4.54Buy NowIndonesia-710 Diamonds
Indonesia-710 DiamondsUSD 4.83Buy NowIndonesia-720 Diamonds
Indonesia-720 DiamondsUSD 4.54Buy NowIndonesia-700 Diamonds
Indonesia-700 DiamondsUSD 4.88Buy NowIndonesia-725 Diamonds
Indonesia-725 DiamondsUSD 4.88Buy NowIndonesia-740 Diamonds
Indonesia-740 DiamondsUSD 5.02Buy NowIndonesia-770 Diamonds
Indonesia-770 DiamondsUSD 5.22Buy NowIndonesia-790 Diamonds
Indonesia-790 DiamondsUSD 5.32Buy NowIndonesia-800 Diamonds
Indonesia-800 DiamondsUSD 5.41Buy NowIndonesia-820 Diamonds
Indonesia-820 DiamondsUSD 5.61Buy NowIndonesia-840 Diamonds
Indonesia-840 DiamondsUSD 5.71Buy NowIndonesia-860 Diamonds
Indonesia-860 DiamondsUSD 5.80Buy NowIndonesia-910 Diamonds
Indonesia-910 DiamondsUSD 6.18Buy NowIndonesia-930 Diamonds
Indonesia-930 DiamondsUSD 6.28Buy NowIndonesia-925 Diamonds
Indonesia-925 DiamondsUSD 6.33Buy NowIndonesia-1000 Diamonds
Indonesia-1000 DiamondsUSD 6.35Buy NowIndonesia-1050 Diamonds
Indonesia-1050 DiamondsUSD 7.15Buy NowIndonesia-1060 Diamonds
Indonesia-1060 DiamondsUSD 7.25Buy NowIndonesia-1075 Diamonds
Indonesia-1075 DiamondsUSD 7.25Buy NowIndonesia-1080 Diamonds
Indonesia-1080 DiamondsUSD 7.29Buy NowIndonesia-1125 Diamonds
Indonesia-1125 DiamondsUSD 7.63Buy NowIndonesia-1145 Diamonds
Indonesia-1145 DiamondsUSD 7.72Buy NowIndonesia-1200 Diamonds
Indonesia-1200 DiamondsUSD 8.16Buy NowIndonesia-1215 Diamonds
Indonesia-1215 DiamondsUSD 8.21Buy NowIndonesia-1300 Diamonds
Indonesia-1300 DiamondsUSD 8.84Buy NowIndonesia-1440 Diamonds
Indonesia-1440 DiamondsUSD 9.67Buy NowIndonesia-1450 Diamonds
Indonesia-1450 DiamondsUSD 9.08Buy NowIndonesia-1490 Diamonds
Indonesia-1490 DiamondsUSD 10.05Buy NowIndonesia-1510 Diamonds
Indonesia-1510 DiamondsUSD 10.14Buy NowIndonesia-1580 Diamonds
Indonesia-1580 DiamondsUSD 10.63Buy NowIndonesia-1795 Diamonds
Indonesia-1795 DiamondsUSD 12.12Buy NowIndonesia-1800 Diamonds
Indonesia-1800 DiamondsUSD 12.17Buy NowIndonesia-1875 Diamonds
Indonesia-1875 DiamondsUSD 12.56Buy NowIndonesia-2020 Diamonds
Indonesia-2020 DiamondsUSD 13.15Buy NowIndonesia-1975 Diamonds
Indonesia-1975 DiamondsUSD 13.33Buy NowIndonesia-2000 Diamonds
Indonesia-2000 DiamondsUSD 13.47Buy NowIndonesia-2005 Diamonds
Indonesia-2005 DiamondsUSD 13.52Buy NowIndonesia-2100 Diamonds
Indonesia-2100 DiamondsUSD 13.61Buy NowIndonesia-2140 Diamonds
Indonesia-2140 DiamondsUSD 13.89Buy NowIndonesia-2160 Diamonds
Indonesia-2160 DiamondsUSD 13.94Buy NowIndonesia-2180 Diamonds
Indonesia-2180 DiamondsUSD 13.62Buy NowIndonesia-2190 Diamonds
Indonesia-2190 DiamondsUSD 14.03Buy NowIndonesia-2200 Diamonds
Indonesia-2200 DiamondsUSD 14.12Buy NowIndonesia-2210 Diamonds
Indonesia-2210 DiamondsUSD 14.21Buy NowIndonesia-2225 Diamonds
Indonesia-2225 DiamondsUSD 14.36Buy NowIndonesia-2280 Diamonds
Indonesia-2280 DiamondsUSD 14.68Buy NowIndonesia-2350 Diamonds
Indonesia-2350 DiamondsUSD 15.14Buy NowIndonesia-2355 Diamonds
Indonesia-2355 DiamondsUSD 15.18Buy NowIndonesia-2400 Diamonds
Indonesia-2400 DiamondsUSD 15.42Buy NowIndonesia-2575 Diamonds
Indonesia-2575 DiamondsUSD 16.63Buy NowIndonesia-2720 Diamonds
Indonesia-2720 DiamondsUSD 17.60Buy NowIndonesia-2750 Diamonds
Indonesia-2750 DiamondsUSD 17.69Buy NowIndonesia-3000 Diamonds
Indonesia-3000 DiamondsUSD 19.32Buy NowIndonesia-3310 Diamonds
Indonesia-3310 DiamondsUSD 21.32Buy NowIndonesia-3620 Diamonds
Indonesia-3620 DiamondsUSD 23.22Buy NowIndonesia-3640 Diamonds
Indonesia-3640 DiamondsUSD 22.70Buy NowIndonesia-3675 Diamonds
Indonesia-3675 DiamondsUSD 23.54Buy NowIndonesia-3800 Diamonds
Indonesia-3800 DiamondsUSD 24.34Buy NowIndonesia-4000 Diamonds
Indonesia-4000 DiamondsUSD 25.60Buy NowIndonesia-4050 Diamonds
Indonesia-4050 DiamondsUSD 25.97Buy NowIndonesia-4340 Diamonds
Indonesia-4340 DiamondsUSD 27.91Buy NowIndonesia-4450 Diamonds
Indonesia-4450 DiamondsUSD 28.52Buy NowIndonesia-4720 Diamonds
Indonesia-4720 DiamondsUSD 30.24Buy NowIndonesia-4800 Diamonds
Indonesia-4800 DiamondsUSD 30.88Buy NowIndonesia-4850 Diamonds
Indonesia-4850 DiamondsUSD 31.26Buy NowIndonesia-5500 Diamonds
Indonesia-5500 DiamondsUSD 35.24Buy NowIndonesia-5600 Diamonds
Indonesia-5600 DiamondsUSD 35.90Buy NowIndonesia-6000 Diamonds
Indonesia-6000 DiamondsUSD 38.46Buy NowIndonesia-6480 Diamonds
Indonesia-6480 DiamondsUSD 41.56Buy NowIndonesia-6550 Diamonds
Indonesia-6550 DiamondsUSD 41.90Buy NowIndonesia-6900 Diamonds
Indonesia-6900 DiamondsUSD 44.16Buy NowIndonesia-7290 Diamonds
Indonesia-7290 DiamondsUSD 45.07Buy NowIndonesia-7295 Diamonds
Indonesia-7295 DiamondsUSD 46.49Buy NowIndonesia-7310 Diamonds
Indonesia-7310 DiamondsUSD 46.63Buy NowIndonesia-7340 Diamonds
Indonesia-7340 DiamondsUSD 46.81Buy NowIndonesia-7360 Diamonds
Indonesia-7360 DiamondsUSD 46.90Buy NowIndonesia-7430 Diamonds
Indonesia-7430 DiamondsUSD 47.38Buy NowIndonesia-7645 Diamonds
Indonesia-7645 DiamondsUSD 48.76Buy NowIndonesia-7650 Diamonds
Indonesia-7650 DiamondsUSD 48.81Buy NowIndonesia-8010 Diamonds
Indonesia-8010 DiamondsUSD 51.08Buy NowIndonesia-8730 Diamonds
Indonesia-8730 DiamondsUSD 55.73Buy NowIndonesia-9290 Diamonds
Indonesia-9290 DiamondsUSD 59.49Buy NowIndonesia-9800 Diamonds
Indonesia-9800 DiamondsUSD 62.60Buy NowIndonesia-14580 Diamonds
Indonesia-14580 DiamondsUSD 92.88Buy NowLATAM-Booyah Pass Card
LATAM-Booyah Pass CardUSD 3.84Buy NowLATAM-Grenade - Burger Bang
LATAM-Grenade - Burger BangUSD 1.32Buy NowLATAM-Loot Box - Boxed Burger
LATAM-Loot Box - Boxed BurgerUSD 1.32Buy NowLATAM-Weekly Membership
LATAM-Weekly MembershipUSD 2.41Buy NowLATAM-Backpack - Strapped Sub
LATAM-Backpack - Strapped SubUSD 1.94Buy NowLATAM-Gloo Wall - Burger Bang
LATAM-Gloo Wall - Burger BangUSD 1.94Buy NowLATAM-341 Diamonds
LATAM-341 DiamondsUSD 1.93Buy NowLATAM-572 Diamonds
LATAM-572 DiamondsUSD 3.25Buy NowLATAM-1166 Diamonds
LATAM-1166 DiamondsUSD 6.03Buy NowLATAM-Monthly Membership
LATAM-Monthly MembershipUSD 11.64Buy NowLATAM-2398 Diamonds
LATAM-2398 DiamondsUSD 11.97Buy NowLATAM-6160 Diamonds
LATAM-6160 DiamondsUSD 30.46Buy NowMalaysia/Singapore-Weekly Membership
Malaysia/Singapore-Weekly Membership USD 1.46Buy NowMalaysia/Singapore-Evo Access 30D
Malaysia/Singapore-Evo Access 30D USD 2.12Buy NowMalaysia/Singapore-310 Diamonds
Malaysia/Singapore-310 Diamonds USD 2.51Buy NowMalaysia/Singapore-520 Diamonds
Malaysia/Singapore-520 Diamonds USD 4.19Buy NowMalaysia/Singapore-Monthly Membership
Malaysia/Singapore-Monthly MembershipUSD 7.16Buy NowMalaysia/Singapore-1060 Diamonds
Malaysia/Singapore-1060 Diamonds USD 8.25Buy NowMalaysia/Singapore-2180 Diamonds
Malaysia/Singapore-2180 Diamonds USD 16.69Buy NowMalaysia/Singapore-5600 Diamonds
Malaysia/Singapore-5600 Diamonds USD 41.27Buy NowMalaysia/Singapore-11500 Diamonds
Malaysia/Singapore-11500 Diamonds USD 85.01Buy NowMiddle East-110 Diamonds
Middle East-110 DiamondsUSD 0.86Buy NowMiddle East-231 Diamonds
Middle East-231 DiamondsUSD 1.72Buy NowMiddle East-583 Diamonds
Middle East-583 DiamondsUSD 4.27Buy NowMiddle East-1188 Diamonds
Middle East-1188 DiamondsUSD 8.50Buy NowMiddle East-2420 Diamonds
Middle East-2420 DiamondsUSD 16.99Buy NowTaiwan-100 Diamonds
Taiwan-100 DiamondsUSD 0.90Buy NowTaiwan-Evo Access 3D
Taiwan-Evo Access 3DUSD 0.90Buy NowTaiwan-170 Diamonds
Taiwan-170 DiamondsUSD 1.39Buy NowTaiwan-Evo Access 7D
Taiwan-Evo Access 7DUSD 1.77Buy NowTaiwan- Level Up Pass
Taiwan- Level Up PassUSD 1.76Buy NowTaiwan-Weekly Card
Taiwan-Weekly CardUSD 1.76Buy NowTaiwan-350 Diamonds
Taiwan-350 DiamondsUSD 2.75Buy NowTaiwan-520 Diamonds
Taiwan-520 DiamondsUSD 4.28Buy NowTaiwan-Booyah Pass
Taiwan-Booyah PassUSD 5.33Buy NowTaiwan-925 Diamonds
Taiwan-925 DiamondsUSD 6.90Buy NowTaiwan-Evo Access 30D
Taiwan-Evo Access 30DUSD 7.13Buy NowTaiwan-Monthly Card
Taiwan-Monthly CardUSD 7.68Buy NowTaiwan-1060 Diamonds
Taiwan-1060 DiamondsUSD 8.43Buy NowTaiwan-1875 Diamonds
Taiwan-1875 DiamondsUSD 13.80Buy NowTaiwan-2180 Diamonds
Taiwan-2180 DiamondsUSD 17.14Buy NowTaiwan-3800 Diamonds
Taiwan-3800 DiamondsUSD 27.59Buy NowTaiwan-5600 Diamonds
Taiwan-5600 DiamondsUSD 43.57Buy NowTaiwan-7650 Diamonds
Taiwan-7650 DiamondsUSD 59.05Buy NowTaiwan-9800 Diamonds
Taiwan-9800 DiamondsUSD 73.82Buy NowThailand-172 Diamond
Thailand-172 DiamondUSD 1.38Buy NowThailand-Weekly
Thailand-WeeklyUSD 1.86Buy NowThailand-310 Diamonds
Thailand-310 DiamondsUSD 2.46Buy NowThailand-517 Diamond
Thailand-517 DiamondUSD 4.10Buy NowThailand-690 Diamond
Thailand-690 DiamondUSD 5.31Buy NowThailand-1052 Diamond
Thailand-1052 DiamondUSD 7.97Buy NowThailand-Montlhy Pass
Thailand-Montlhy PassUSD 8.06Buy NowThailand-1801 Diamond
Thailand-1801 DiamondUSD 13.28Buy NowThailand-3698 Diamond
Thailand-3698 DiamondUSD 26.55Buy NowVietnam-283 Diamonds
Vietnam-283 Diamonds USD 1.68Buy NowVietnam-566 Diamonds
Vietnam-566 Diamonds USD 3.37Buy NowVietnam-1132 Diamonds
Vietnam-1132 Diamonds USD 6.74Buy NowVietnam-2830 Diamonds
Vietnam-2830 Diamonds USD 16.83Buy Now
Patch Balance Impacts: OB52 and OB53 Shakeups
The OB52 10-second reset rule dismantled high-mobility rush playstyles. Mobile rushers like Tatsuya and Wukong previously chained skill resets through extended multi-team skirmishes. Under current rules, securing a knockdown starts a strict 10-second timer. If you do not register a follow-up elimination before that window shuts, the ability triggers a 90-second cooldown penalty. Mistiming an aggressive dash with Tatsuya strands you in open ground.
Reconnaissance dropped in priority with OB53. Mark and tracking durations were reduced across intel characters, including Moco, Koda, Otho, and Shirou. Garena trimmed wall-tracking visibility to prioritize direct mechanical trades over pre-firing tagged silhouettes through soft cover.
Defensive trading gained value. Shani's Gear Recycle passive saw its armor shield duration double to 10 seconds upon skill activation, granting brawlers extended protection during trades. Ford's reworked Iron Will now activates automatically upon taking damage, restoring 10 HP per second for 3 seconds on a 20-second cooldown. This change removes passive blue-zone stalling tactics and refocuses Ford on close-range reactive duels.
Best Character Combinations in Free Fire (Ranked BR)
Climbing through Master and Grandmaster in Battle Royale demands a setup balancing area denial, HP recovery, and team utility. Solo queue requires complete self-sufficiency, while four-player squads require distinct role distribution.
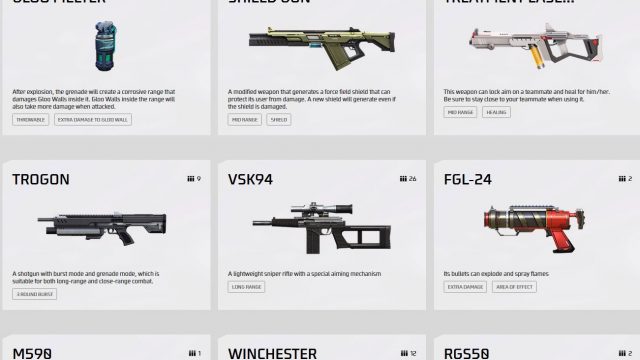
The Frontline Breaker Setup
- Active Skill: Ray (Bond of Eclipse)
- Passive 1: Jota (Sustained Raids)
- Passive 2: Kairos (Defense Breaker)
- Passive 3: Alvaro (Split Blitz)
This loadout punishes turtling teams. Ray secures target acquisition and execution resets. Kairos provides Defense Breaker, inflicting 120% bonus shield and armor degradation during Breaker Mode to crack Level 3 vests immediately. Alvaro magnifies thrown ordnance: Awakened Alvaro splits grenades 1 second before detonation into 3 cluster munitions dealing 30% of base blast damage each. Downed targets trigger Jota's Sustained Raids; post-OB53, this HP restoration applies to all knockdown types, including explosive blasts, sniper shots, and vehicle collisions.
To pick up meta picks like Ray or buy loadout passes directly, secure your resources through a Free Fire diamond top up to avoid bottlenecks in competitive preparation.
The Long-Range Concealment Scout
- Active Skill: Kenta (Swordsman's Wrath)
- Passive 1: Morse
- Passive 2: Dasha (Partying On)
- Passive 3: Nairi (Ice Iron)
Morse enables wide flank angles by granting sprint velocity and making you invisible to line-of-sight past 16 meters. You can cross exposed fields without drawing sniper fire. When engaging, Kenta's Swordsman's Wrath deploys a 5-meter frontal barrier blocking 60% of incoming ballistic damage (20% while firing) for 5 seconds on a 70-second cooldown.
Knocking down a target triggers Dasha's Partying On passive, entering Highlight mode to increase fire rate by 18% and sprint speed by 12% for 6 seconds. Chaining consecutive knocks adds 4% fire rate and 3% speed, letting you wipe separated squads before they can return fire.
Dominating Clash Squad: Short-Range Combos
Clash Squad rounds hinge on engagements under 20 meters. You cannot afford long-range poke phases; you need burst protection and cover destruction.
Clash Squad Aggression Priority:
1. Deploy Skyler to shatter defending Gloo Walls.
2. Push through the breach using Jota for instant HP resets.
3. Stack Lila's Gloo Strike to freeze enemy repositioning.
4. Close the round before the opposing team can regroup.
Skyler anchors this mode. Riptide Rhythm fires a sonic wave that demolishes enemy Gloo Walls, wiping out cover during trades. Skyler also restores health whenever placing personal Gloo Walls. Pair him with Lila, whose Gloo Strike slows targets hit by rifle rounds and grants bonus Gloo Walls on knockdowns.
Complete the Clash Squad setup with Jota for immediate post-knock recovery and Kassie, whose Electro Therapy delivers continuous tether healing or a 100 HP burst heal to sustain teammates during trades.
Acquisition Breakdown: Gold vs. Diamonds
Character acquisition follows split pricing rules. While Garena rework notes state characters will transition to Gold, storefront catalogs retain diamond barriers on select operatives and dual pricing on others.
| Character | Shop Currency Cost | Skill Classification | Tactical Role |
|---|---|---|---|
| Ryden | 25,000 Gold / 499 Diamonds | Active (Spider Trap) | Traps enemies with 80% slow and bleed damage (75s cooldown) |
| Lila | 20,000 Gold / 400 Diamonds | Passive (Gloo Strike) | Rifle hits slow targets; grants bonus Gloo Walls on knockdown |
| Kairos | 20,000 Gold | Passive (Defense Breaker) | 120% bonus shield and armor degradation in Breaker Mode |
| Kassie | 20,000 Gold | Active (Electro Therapy) | Tether health restoration or a 100 HP instant burst heal |
| Tatsuya | 499 Diamonds | Active (Rebel Rush) | Multi-dash mobility; subject to the OB52 reset rule |
| Nairi | 499 Diamonds | Passive (Ice Iron) | Heals Gloo Walls and grants squad durability recovery |
The table reflects current storefront pricing paths; characters may be available via direct Gold accumulation or premium Diamonds.
If you run strictly on Gold, buy Kairos and Kassie first. Kairos counters vest protection, and Kassie offers reliable active support. For heroes locked behind diamonds like Tatsuya or Nairi, plan your spending. You can top up Free Fire diamonds to unlock these units without draining event currencies.
Precision Aim Tuning: Drag-Headshot Configurations
Equipping the free fire best characters will not compensate for crosshairs stuck on chest hitboxes. Ranked duels depend heavily on drag-headshot mechanics. Aligning passive skills with calibrated camera sensitivities gives an immediate mechanical advantage.

Stack fire-rate modifiers like Luna and Wolfrahh with specific slider setups. Wolfrahh reduces incoming headshot damage while increasing dealt headshot damage for each spectator watching. Luna increases base fire rate, converting standard SMGs into precise mid-range tools.
| Control Sensitivity Parameter | Optimal Calibration Range | Tactical Objective |
|---|---|---|
| General | 95 – 100 | Rapid target acquisition, swift turning, close-range screen drag |
| Red Dot | 90 – 95 | Clean micro-adjustments for un-scoped drag headshots |
| 2x Scope | 80 – 85 | Controlled vertical crosshair lift for mid-range rifle duels |
| 4x Scope | 70 – 75 | Stable recoil tracking for DMR and sniper headshots |
These sensitivity brackets prevent your crosshair from skipping completely over enemy head hitboxes during aggressive upward drags.
Setting General sensitivity close to 100 ensures light upward drags move your reticle directly from the chest to the head. Pushing sensitivity past 100 via third-party device multipliers sends your aim over the target. Keep sliders within these brackets to ensure your passive buffs translate into consistent hits.
Step-by-Step Ranked Playbook for Pushing Grandmaster
Consistent execution matters as much as roster selection. When climbing from Master to Grandmaster, use this round workflow to protect rank score:
- Lock Your Preset Slot: Before queueing, choose one of your 5 preset slots tuned for the specific queue. Never take a Clash Squad setup into Battle Royale where sustain dictates survival.
- Drop Selection and Coin Gathering: Land near peripheral compounds offering high vending machine density. Farm 600 FF Coins early. This funds a Super Revival Card, ensuring any revived squadmate drops back into play with Level 2 Armor and a UMP.
- Engage with Cooldown Awareness: On Tatsuya or Wukong, never burn your final dash to initiate unless you can confirm a knock within the 10-second reset window. Missing that window leaves you with a 90-second cooldown penalty.
- Utilize Shani and Jota in Mid-Game Rotations: Take intermediate poke fights to deplete opposing armor. Shani's 10-second shield protects your base health during trades, while Jota provides recovery on knockdowns scored with guns, vehicles, or grenades.
- Late-Zone Fortification and Breach: In final circles, throw Awakened Alvaro's split grenades to shatter defensive Gloo Walls. Once cover drops, push under Orion's invulnerability or Ray's target tracking to close out the match.
Keep your active roster flexible as balance shifts. Whenever you expand your pool or grab newly released operatives, you can use a direct Garena Free Fire top up to add the tools your team requires.
FAQ
Which character is currently the best overall pick in Free Fire in 2026?
DJ Alok remains the most consistent generalist pick due to his combined 15% movement speed boost and steady 30 HP recovery over 10 seconds. For hyper-aggressive players seeking pure eliminations, Ray leads the offensive meta thanks to his wall-tracking and instant execution resets.
How many active and passive abilities can you equip in a single loadout?
You can equip exactly one active skill and three passive skills across your loadout. The game provides 5 distinct preset slots so you can build specialized configurations for Battle Royale, Clash Squad, and solo climbing.
How did the OB53 patch change Jota's Sustained Raids ability?
Jota's healing effect now triggers on all knockdown types across the board. In previous patches, the HP recovery was strictly limited to SMG and shotgun eliminations, but it now functions with assault rifles, snipers, explosives, and vehicles.
What balance nerf affected Tatsuya and Wukong in OB52?
Both characters are subject to a strict 10-second kill-reset window. If you trigger an initial reset upon knocking down an enemy but fail to eliminate another player within 10 seconds, the skill locks into a punishing 90-second cooldown.
Do you still need to level up characters to maximize their skill attributes?
No, character level grinding has been completely removed from skill progression. Characters unlock with their full mechanical statistics immediately upon acquisition, leaving Bond levels purely for cosmetic rewards.
What is the best character combo for pushing Grandmaster in Clash Squad?
The most dominant Clash Squad combination pairs an aggressive active skill like Skyler or Chrono with Jota, Kairos, and Lila. This loadout gives your squad immediate cover-busting power, accelerated vest destruction, and reliable HP recovery in close trades.
How does Skyler counter Gloo Wall defensive setups?
Skyler unleashes a targeted sonic wave that damages and destroys multiple enemy Gloo Walls in its path. In addition, every Gloo Wall Skyler deploys generates steady personal health regeneration, rewarding players who push aggressively.
Final Tactical Assessment
The 2026 ranked meta in Free Fire favors aggressive squads. Defensive stalemates are gone. Between Ray's execution tracking, Kairos shredding armor plates, and Alvaro turning frag grenades into clustered barrages, passive play drops your rating.
For a consistent ladder climb, build around Alok or Xayne supported by Jota's universal knockdown healing. If you rely on raw aim and rapid repositioning, run Tatsuya while tracking the OB52 reset timer. Lock in your sensitivities, prepare your presets before entering matchmaking, and control the opening trade.



Comments