Learn how to clear Conqueror Challenge Stage 10 in One Punch Man: The Strongest with speed tuning, budget lineup comps, and manual combat tactics.
Stage 10 of Conqueror Challenge is the steepest gear check in One Punch Man: The Strongest. If your squad lacks speed tuning or fires skills on auto-pilot, bosses wipe your frontline before you trigger an ultimate. Brute force stops working after Stage 9. To clear Stage 10 without burning daily resources, you need fixed boss rotations, damage reflection, and manual turn order control.
Understanding Boss Rotations and Vitality Management
Conqueror Challenge runs on a fixed weekly schedule. Facing the wrong boss with an unprepared team drains your stamina for zero gain.
Every solo attempt costs 8 Vitality cans (soda). That tally adds up fast during roster testing. Running the dungeon in co-op mode cuts vitality cost per clear compared to solo runs. Always party up with a club mate or friend. Once multi-clears unlock, use Battle Chips to speed through farming runs.
The schedule below outlines weekly boss appearances and their primary threats.
| Boss Name | Active Days | Core Combat Mechanic |
|---|---|---|
| Deep Sea King | Monday / Thursday / Sunday | High single-target burst and Corrode DoT application |
| Sky King | Tuesday / Friday / Sunday | Team-wide ATK buffing requiring immediate speed control |
| Subterranean King | Wednesday / Saturday / Sunday | Heavy frontline row attacks paired with Burn DoT |
Takeaway: Sundays offer access to all three bosses, making it the premier day to dump banked vitality into co-op gear runs.
If you run low on stamina while optimizing lineups, grab One Punch Man: The Strongest top-up options to maintain daily diamond refills and stamina refreshes.

One Punch Man: The Strongest Coupons
13 Coupons
 13 CouponsUSD 1.23Buy Now
22 Coupons
22 CouponsUSD 1.72Buy Now23 Coupons
23 CouponsUSD 2.30Buy Now54 Coupons
54 CouponsUSD 4.29Buy Now61 Coupons
61 CouponsUSD 6.14Buy Now107 Coupons
107 CouponsUSD 8.59Buy Now91 Coupons
91 CouponsUSD 9.21Buy Now214 Coupons
214 CouponsUSD 17.17Buy Now227 Coupons
227 CouponsUSD 23.01Buy Now321 Coupons
321 CouponsUSD 25.76Buy Now2669 Coupons
2669 CouponsUSD 214.63Buy Now8007 Coupons
8007 CouponsUSD 654.24Buy Now16013 Coupons
16013 CouponsUSD 1308.47Buy Now
Why Manual Combat Is Mandatory on Stage 10
Auto mode guarantees a wipe on Stage 10. The game's default targeting burns energy on whoever has an ultimate ready, ignoring tactical priority.
Auto-battle errors that sabotage your run:
- Support units like Mumen Rider waste speed and attack buffs on low-priority or already-buffed allies.
- Single-target burst hits shielded frontline minions instead of high-threat backline bosses.
- Crowd control abilities fire against targets that are already stunned or immune.
- Crucial energy runs out before primary damage dealers can take their turn.
Stage 10 demands strict timing. Land your crowd control before enemies act, and focus your burst DPS manually. Switch to manual the second the fight begins.
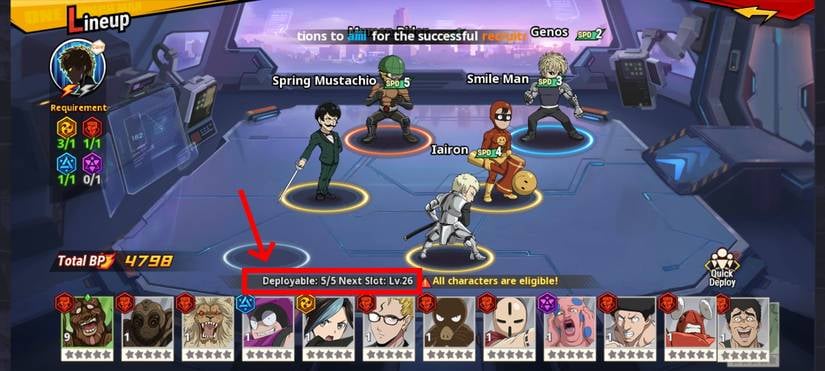
Core Lineup Composition for F2P Players
You do not need a full team of limited banner units. A tuned lineup built around utility, crowd control, and percentage-based damage reflection beats raw battle power every time.
Core Hero: Child Emperor
Child Emperor serves as the best PvE core for this floor. His basic core skill grants 2 energy whenever an ally lands a critical hit (up to 4 times per battle), enabling back-to-back ultimates on turn 1. His row-clearing ultimate attack also carries a 50% stun chance against front-row enemies.
Single-Target Assassin: Amai Mask
Amai Mask is your primary boss executioner. Stage 10 penalizes wide AoE; you need concentrated burst to drop high-damage threats before their second turn. Amai Mask targets backline threats directly with heavy multi-hit strikes. When his core skill activates, securing a kill generates 6 immediate energy to fuel your rotation.
The Reflect Wall: Carnage Kabuto
Carnage Kabuto absorbs boss burst damage. His passive reflects 20% of incoming damage directly back to the entire enemy lineup. When Stage 10 bosses unleash massive hits, Kabuto turns that incoming damage into unblockable team-wide AoE. Stack high HP gear on him to increase the reflected total.
Damage Over Time & Debuffers
Percentage-based DoT bypasses enemy defense stat walls. Units like Subterranean King, Deep Sea King, and Groribas apply Burn and Corrode effects (up to 30% debuff scaling) that steadily drain boss health bars while your team defends.
Speed Tuning Your Turn Order
Speed dictates survival on Stage 10. Bosses and minions enter with boosted base speed. If the enemy moves before your defensive shields or stuns land, your squad wipes on Turn 1.
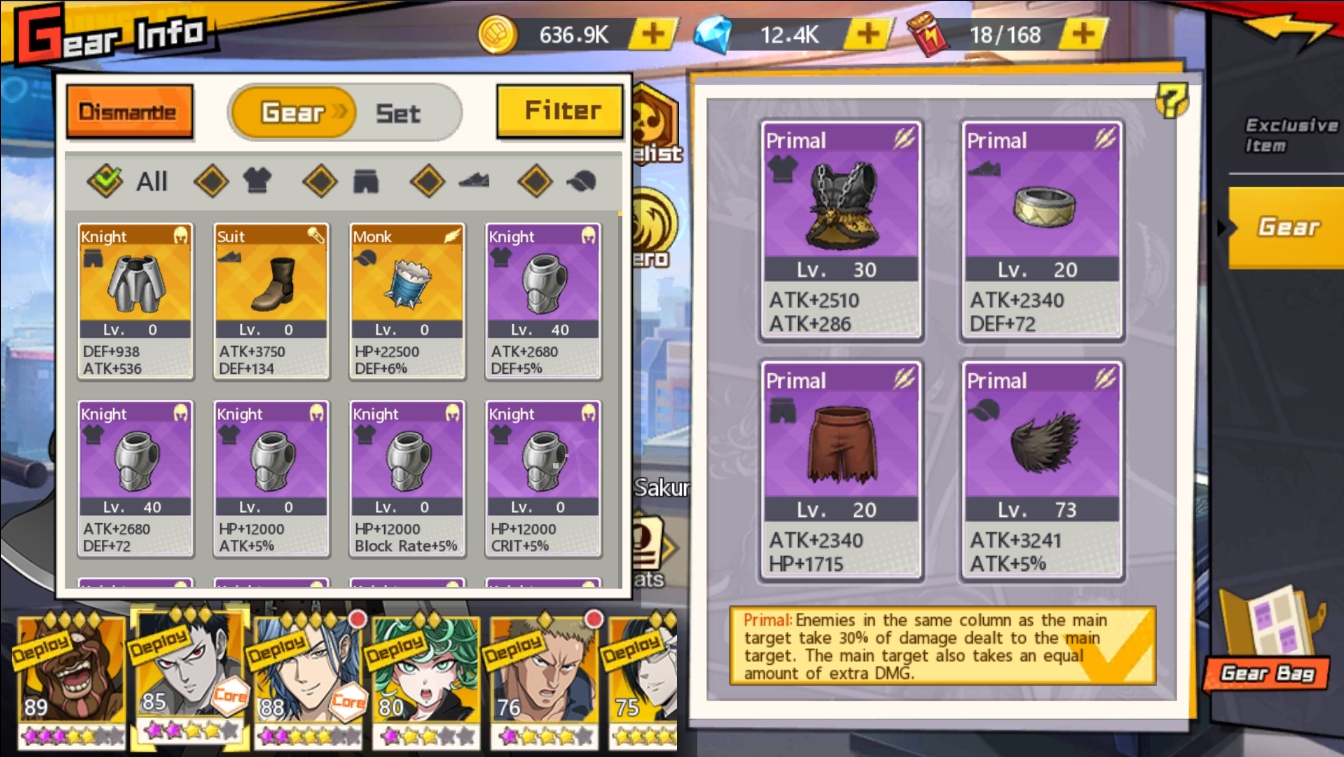
Speed tuning means adjusting individual unit Speed via gear to force a strict action sequence:
| Turn Priority | Unit Role | Recommended Gear Set | Primary Objective |
|---|---|---|---|
| 1st | Crowd Control / Buff | Monk (+10% Speed) | Apply stun or team buff before boss acts |
| 2nd | Defense Shred / Debuff | Martial Arts (+10% ATK) | Apply Shatter or Corrode to soften targets |
| 3rd | Energy Generator / Burst | Prisoner (+15% Crit DMG) | Trigger crits for Child Emperor core energy |
| 4th | Primary Single-Target DPS | Prisoner (+15% Crit DMG) | Burst down high-priority backline or boss |
| 5th | DoT / Cleave DPS | Martial Arts (+10% ATK) | Apply Burn or finish off weakened minions |
| 6th | Frontline Tank / Reflect | Battle (+10% HP) | Absorb incoming hits and reflect 20% damage |
Takeaway: Your crowd-control unit must exceed the boss speed bracket using Monk gear, ensuring your team sets the tempo of the fight.
Equipping the Monk set gives a flat 10% Speed bonus, pushing your fastest support past the boss's initiative threshold.
Turn-by-Turn Stage 10 Boss Strategies
Every boss demands a specific sequence. Execute these turn rotations to secure your clears:
Deep Sea King Strategy
Deep Sea King inflicts massive single-target damage and applies Corrode DoT.
- Turn 1: Use your fastest unit to apply a defensive shield or speed boost. Fire Child Emperor's ultimate at the front row to roll for the 50% stun. Target Deep Sea King with Amai Mask to chip his health before his rage bar fills.
- Turn 2: Deep Sea King strikes your primary frontline tank. Carnage Kabuto must absorb this hit, reflecting 20% back to the boss and surviving minions.
- Turn 3: Clear front-row minions with secondary DPS. Direct all single-target ultimates onto Deep Sea King to finish the fight.
Sky King Strategy
Sky King buffs his entire team's attack, making drawn-out fights fatal.
- Turn 1: Act first. Disable Sky King or his main damage support with a CC ultimate. If the stun fails, apply Shatter to shred his damage resistance.
- Turn 2: Fire Amai Mask's ultimate into Sky King. Use Child Emperor's crit energy procs to cast a second single-target ultimate in the same turn.
- Turn 3: With Sky King down or nearly dead, soak remaining minion hits on your Battle-set frontline and clean up.
Subterranean King Strategy
Subterranean King unleashes heavy front-row cleaves and stacks Burn DoT.
- Turn 1: Balance your front-row bulk. Never place two fragile units alongside your main tank. Use Child Emperor to fish for front-row minion stuns.
- Turn 2: Subterranean King executes his row cleave. Carnage Kabuto reflects 20% of this AoE hit back across the enemy team, heavily damaging their backline.
- Turn 3: Concentrate burst DPS on Subterranean King before Burn ticks deplete your tank.
To expand stamina and summon resources, you can get diamonds for vitality refreshes to maintain your daily farming schedule.
Maximizing Gear Sets and Star Ascension
Stage 10 requires active four-piece set bonuses. Mismatched gear pieces with decent base stats will not reach the necessary stat thresholds.
Recommended Four-Piece Gear Sets
- Monk Set: Provides +10% Speed. Mandatory for your turn-1 support or CC unit.
- Martial Arts Set: Provides +10% ATK. Best suited for debuffers and secondary DPS.
- Prisoner Set: Provides +15% Crit DMG. Ideal for Amai Mask and Child Emperor to maximize critical burst and core energy generation.
- Battle Set: Provides +10% HP. Essential for Carnage Kabuto and frontline shields to maximize survivability and reflection values.
Star Ascension Cards
Star Ascension Cards from the Supply Depot upgrade gear rarity tiers. These cards provide flat ATK and HP while adding fixed sub-stat bonuses:
- Crit DMG: Adds +5% Crit DMG per upgraded tier.
- Block Rate: Adds +5% Block rate for frontline tanks.
| Progression System | Material / Source | Stat Bonus Provided | Recommended Unit Allocation |
|---|---|---|---|
| Monk 4-Piece | Gear Farming / Drops | +10% Speed | Primary CC / Support (Child Emperor) |
| Prisoner 4-Piece | Gear Farming / Drops | +15% Crit DMG | Single-Target Burst (Amai Mask) |
| Battle 4-Piece | Gear Farming / Drops | +10% HP | Frontline Tank (Carnage Kabuto) |
| Star Ascension Card | Supply Depot | +5% Crit DMG, +5% Block | High-Tier DPS & Frontline Tanks |
| Red Gear Conversion | Level 90 Orange Base | Red Set Bonuses (Machine, Drive, etc.) | End-Game Carry DPS |
Takeaway: Focus your Star Ascension Cards on your primary burst attacker's Prisoner set first to guarantee reliable critical hits for core energy.
Converting base orange gear into specialized Red Gear (such as Machine, Drive, Fiery, or Ninja sets) requires level 90 gear, 1 Red Sketch Blueprint, and 100 Fusion Catalysts.
Account Progression Checks: Limit Breaks and Saitama Training
If you wipe despite correct turn order and full gear sets, your baseline account stats are behind.
2-Star Limit Break Priorities
A 2-Star limit break is mandatory for Stage 10. Limit breaking requires character badges, hero shards, and coins (12 badges and 20,000 coins per milestone tier). More importantly, the 2-Star upgrade unlocks passive skills. Without passives active, Carnage Kabuto cannot reflect damage, and Child Emperor loses his team utility.
Saitama Daily Training
Complete daily Saitama fitness quests for up to 5 Talent Points each day. Each talent node grants 200 to 400 baseline Battle Points (BP) across your account. These incremental health, attack, and defense nodes build the durability required to survive boss rage turns.
Redeem Active Progression Codes
Enter active gift codes in your profile settings menu for extra diamonds and upgrade materials:
- TFTOPM
- OPM777
- OPMTS
To keep roster upgrades moving without stamina bottlenecks, use an OPM The Strongest top up voucher to secure resources for summons and gear progression.
FAQ
What is the recommended combat mode for clearing Conqueror Challenge Stage 10?
Manual combat is strongly recommended to control target priority and skill timing. Auto mode often mismanages energy and buffs, leading to wipes on high-damage boss turns.
Why is speed tuning crucial in Stage 10 Conqueror Challenge?
High speed ensures your debuffers and crowd-control units act before the boss attacks. Gaining turn priority allows you to apply stun, shatter, or shields to mitigate lethal damage.
Which core units work best for clearing Conqueror Challenge Stage 10?
Child Emperor and Amai Mask are top choices for their energy generation and single-target burst. Child Emperor provides additional energy on crits, while Amai Mask quickly eliminates key threats.
How much Vitality does each Conqueror Challenge run cost?
Each run consumes 8 Vitality cans. Teaming up with a partner is recommended to maximize farming efficiency.
Which gear sets provide the best advantage for clearing Stage 10?
Monk set for Speed and Prisoner set for Crit Damage give your attackers the best stat advantage. Frontline tanks benefit most from HP-boosting Battle sets or Suit reflect gear.
When are the specific Conqueror Challenge bosses available to challenge?
Deep Sea King opens Mon/Thu/Sun, Sky King opens Tue/Fri/Sun, and Subterranean King opens Wed/Sat/Sun. All three bosses are accessible simultaneously on Sunday.
Verdict on Stage 10 Farming
Conqueror Challenge Stage 10 tests mechanics, turn order, and target selection over raw power. If your supports act after the boss, the run fails. Equip your primary crowd controller with a 4-piece Monk set, let Carnage Kabuto reflect incoming burst, and target high-priority threats manually with Amai Mask. Farm in co-op to halve stamina costs, and Stage 10 becomes a routine gear harvest.


Comments