Conquer Destiny Rising Calamity Ops solo without wiping. Master spawn control, shield breaks, and survival tactics to preserve your high-tier rank multipliers.
Solo runs in Calamity Ops instantly expose a fragile build. With no fireteam to absorb aggro, trade revives, or burst down an overshield you missed, a single mistimed sprint or greedy damage window drops your score to zero.
Calamity Ops serves as the pinnacle endgame test in Destiny: Rising. Because accounts run on finite weekly attempt charges that dictate leaderboard placement, failed tickets carry a steep cost. You need specific routing, tight resource discipline, and zero-death clears.
Unlocking Calamity Ops and Managing Weekly Charges
Account progression gates this activity strictly behind Team Level 70 to 72. Reaching this bracket requires clearing campaign nodes, daily commissions, and Haven Ops strikes.
Once Calamity Ops unlocks in Haven Ops, the activity pairs time-decay multipliers with harsh death penalties. In mid-tier divisions, keeping your death count at zero while hitting a 1.5x to 1.6x boss multiplier reliably clears promotion cutoffs.
[Team Level 70-72 Reached]
       │
       ▼
[Unlock Calamity Ops in Haven Ops]
       │
       ▼
[Evaluate Weekly Attempt Charges] ──(Zero Deaths Priority)──► [1.5x - 1.6x Target Multiplier]
       │
       ▼
[Check Active Seasonal Modifiers (Arc/Solar/Void Shields)]
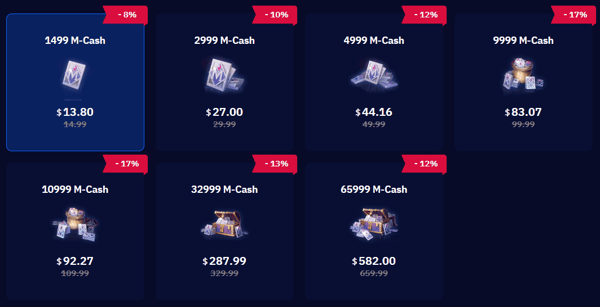
Speed means nothing if you die. Shaving five seconds off a room clear will not offset the score hit of a checkpoint reset. If you need resources to reach entry level, you can buy Pinnacle Energy packs online to speed up your character progression.


Destiny: Rising

The Solo Build Hierarchy: Sustain First, Burst Last
Solo survival demands an inverted build philosophy compared to team strikes. Fireteams stack burst damage. Solo runners die doing that.
Prioritize your build in this order:
- Sustain Layer: Damage reduction traits, passive health guards, and finisher refresh shields.
- Uptime Layer: Reload speed bonuses, ability cooldown reduction, and crowd control triggers.
- Damage Layer: Heavy weapon damage bonuses, elemental surge amplifications, and critical multipliers.
Finisher refresh shields form your baseline lifeline. Triggering a finisher on a wounded major awards invulnerability frames and immediately initiates shield regeneration. Treat damaged combatants as emergency medkits rather than targets to obliterate from across the room.
Ammo discipline matters just as much. Never spend heavy ammo on red-bar trash mobs. Burning through heavy reserves early leaves you dry against elite minibosses, stretching dangerous encounters and forcing fatal positioning errors.
Best Hero Choices for Solo Survival
Your hero pick locks in your entire routing strategy. While early launch meta placed Wolf in S-tier, higher difficulty tiers have pushed him down to C-tier because his melee trade kit exposes him to unmanageable incoming burst.
Jolder: The Safe Fortress
Jolder remains the premier solo anchor. Her Barrier of Starlight deploys a defensive dome that blocks incoming fire while generating Rage to restore health and reload weapons. When an encounter collapses into chaos, her bubble resets the tempo.
Estela: Decoy Aggro and Corruption Scaling
Estela relies on misdirection. Her illusion decoys draw heavy fire away from your line of retreat, causing elites to waste artillery rounds on empty space. Meanwhile, her passive corruption mechanic ticks away at enemy health pools while you stay tucked behind hard cover.
Helhest: Infinite Heavy and Autonomous Healing
Helhest directly counters ammo starvation and attrition damage. Her drone companion pulses regular healing to stabilize shields, and her kit produces on-demand Heavy ammo. That guarantee keeps your heavy burst ready for every major spawn without relying on random drops.
The following breakdown compares how these top solo contenders perform under high-threat operational conditions.
| Character | Primary Solo Mechanism | Defensive Profile | Heavy Ammo Economy | Ideal Playstyle |
|---|---|---|---|---|
| Jolder | Barrier of Starlight dome | Highest (Auto-regen & bullet block) | Standard drop reliance | Bunker down and burst from inside cover |
| Estela | Illusion summons & corruption | Moderate (Aggro redirection) | Standard drop reliance | Mobile skirmishing and damage-over-time |
| Helhest | Autonomous healing drone | High (Continuous pulsing heals) | Superior (On-demand generation) | Mid-range suppressive fire with heavy uptime |
| Wolf | Close-quarters melee bruiser | Low (Requires aggressive trades) | Standard drop reliance | High risk; prone to burst damage in high tiers |
Jolder and Helhest provide the most reliable safety nets, whereas aggressive picks like Wolf carry immense wipe risks in modern tier scaling.
If your current roster lacks these defensive tools, you can use Destiny Rising mobile top up to roll on featured hero banners and secure dedicated solo picks.

Weapon Arsenal: Base DPS and Elemental Coverage
Weapons carry the dual burden of burst output and shield matching. Calamity Ops rotates Seasonal Cycle Modifiers that frequently pair Arc and Solar shields in the same arena. Entering without elemental parity leaves elite shields nearly unbreakable.
Here is how the premiere Exotic weapons rank in base DPS output and operational utility for Calamity Ops:
| Weapon | Base DPS | Element / Archetype | Combat Role & Tactical Utility |
|---|---|---|---|
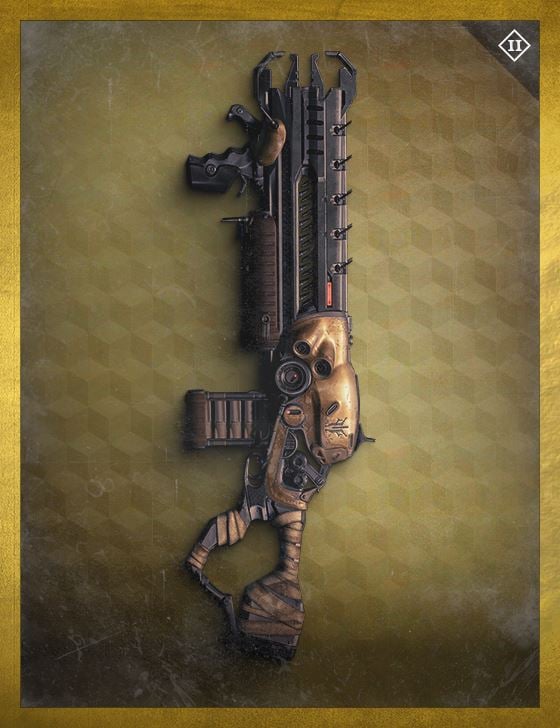
| Lord of Wolves | 1131 | Solar Shotgun | Melts minibosses up close; essential for planned 8–12 second burst windows. |
| Partridge Sky | 1014 | Solar Sword | Massive close-range charge damage; only safe when backed by Jolder's bubble. |
| Jötunn | 660 | Solar Fusion Rifle | Fires tracking explosive blasts that erase grouped adds before they reach cover. |
| Crimson | 469 | Arc Hand Cannon | Precision kills heal the user and refill reserves; core weapon for staying alive. |
| Borealis | 401 | Void/Multi Sniper | Toggles between Void, Arc, and Solar damage to bypass shield-matching locks. |
| The Huckleberry | 394 | Void Submachine Gun | Automatically refills magazine on kill; excellent for wiping out swarming trash. |
Lord of Wolves dominates short burst phases, while utility choices like Crimson and Borealis solve health and elemental matching requirements.
Crimson acts as a primary-slot survival tool. Its 469 base DPS will not shred boss bars, but precision kills restore health and refill the magazine instantly. In minion-heavy rooms, it eliminates attrition deaths.
When facing mixed elemental shields, Borealis offers an immediate solution. At 401 base DPS, its elemental toggling covers Void, Arc, and Solar shields without forcing you to reconfigure your sub-class or armor traits.
Managing Seasonal Modifiers and Pact Buffs
Check the active seasonal rotation before locking in your loadout. Seasonal Cycle Modifiers swap shield affinities and grant specific combat bonuses through Seasonal Pact perks. Aligning your abilities with these rulesets increases damage uptime substantially.
Active Seasonal Pact buffs introduce powerful conditional damage bonuses: - Blindness Exploitation: Grants +8% damage for 8 seconds after blinding an enemy target. - Crowd Control Surge: Grants +15% damage for 8 seconds immediately upon inflicting crowd control (stuns, freezes, or suppresses).
[Engage Elite Pack] ──► [Apply Stun / Crowd Control] ──► [+15% Pact Damage Active (8s)]
                                                               │
                                                               ▼
[Rotate Out to Cover] ◄── [Execute 8-12s DPS Burst] ◄── [Swap to Lord of Wolves (1131 DPS)]
Stack these perks during major spawns. Stunning an elite before drawing Lord of Wolves (1131 base DPS) allows you to erase the target before its counter-attack mechanics deploy.
| Seasonal Pact Effect | Damage Amplification | Duration | Trigger Condition | Best Activation Weapon / Skill |
|---|---|---|---|---|
| Blindness Synergy | +8% Bonus Damage | 8 seconds | Inflict Blind status on enemy | Arc concussive grenades or blinding flash abilities |
| Crowd Control Surge | +15% Bonus Damage | 8 seconds | Apply Stun, Freeze, or Suppress | Jolder shield bashes or stasis traps |
| Elemental Surge | Matches Active Shield | Run Duration | Match damage element to enemy shield | Borealis elemental cycle or matched Solar/Arc weapons |
Aligning crowd control triggers with damage windows gives you high burst output without sacrificing defensive slots.
To prep your arsenal for rotating shields, pick up Destiny Rising top up materials to level alternate weapons like Borealis and Jötunn.
Combat Route: Clearing Waves Without Getting Trapped
Deadly crossfire starts the second you park in the center of an arena. Surviving dense waves requires controlling angles and funneling enemy lines of sight.
Execute every room using four operational steps:
- Swap Perspectives to Scout Angles: Switch to third-person view (TPV) before pushing around blind corners. This exposes enemy positioning without placing your hitbox in firing lanes. Switch back to first-person view (FPV) when executing boss precision phases.
- Eliminate Ranged Combatants First: Snipers and turrets chip your shields and prevent health recovery. Clear them with Borealis or Jötunn (660 base DPS) before addressing rushing melee units.
- Funnel Melee Swarms Through Corridors: Backpedal into chokepoints. Forcing swarms into a tight line allows The Huckleberry or Jötunn's splash damage to wipe the pack efficiently.
- Harvest Majors for Finisher Frames: When an elite health bar drops below the execution threshold, stop firing. Close the gap and trigger the finisher to secure invulnerability frames and full overshield recovery.
Boss Phases: The 8-to-12 Second Rule
Greed ends runs. Pushing for an immediate one-phase boss burn triggers retaliatory mechanics that overwhelm solo players: swarm spawns behind your position, tracking projectile volleys, and floor hazards.
Break boss encounters into controlled 8 to 12-second windows:
- Second 0 to 3: Trigger Crowd Control Surge (+15% damage for 8s) using a flash charge or stun ability.
- Second 4 to 8: Unload burst weapons like Lord of Wolves (1131 DPS) directly into the weak point. If playing Jolder, drop Barrier of Starlight on your position for auto-reloading.
- Second 9 to 12: Empty your current magazine, break line of sight, and disengage completely.
- Second 12+: Regroup behind outer cover. Clean up fresh minion spawns, regenerate shields, and scavenge heavy ammo bricks before triggering another cycle.
Capping burst windows at 12 seconds keeps you ahead of mechanic spikes. Two or three disciplined phases guarantee a clean clear, preserving your 1.5x to 1.6x multiplier without risking a run-ending wipe.
FAQ
What account level is required to access Calamity Ops solo?
Calamity Ops unlocks once your account achieves Team Level 70 to 72. Prior to hitting that threshold, focus your time on running the main campaign, completing daily commissions, and clearing Haven Ops strikes.
Why do my Calamity Ops runs fail even when my damage output is high?
Deaths heavily penalize your final score multiplier and consume finite weekly attempts. In solo runs, prioritizing defensive damage reduction and passive healing over reckless boss burst phases is essential for success.
Which characters offer the best survivability for solo Calamity Ops clears?
Jolder and Estela are top choices due to their protective bubbles and aggro-diverting summons. Helhest is another premier pick thanks to her autonomous healing drone pulses and on-demand Heavy ammo generation.
How long should a solo boss damage window last?
Limit your damage phase to a disciplined 8 to 12-second window before rotating back into cover. Resetting for a safe second window is far better than overcommitting and triggering an immediate wipe.
How do I deal with rotating elemental shields when running solo?
Equip weapons that match the seasonal cycle modifier or use an adaptable weapon like Borealis to swap between Arc, Solar, and Void damage on the fly. Alternatively, select heroes whose innate abilities match active shield modifiers.
When is it appropriate to use Heavy ammo during a run?
Reserve all Heavy ammo exclusively for high-threat minibosses and final boss phases. Expending heavy rounds on standard trash mobs leads to ammo starvation during critical burst checks.
Final Verdict: Discipline Over Greed
Solo execution comes down to emotional discipline over raw speed. The decaying multiplier creates artificial urgency, tempting you into reckless plays when Calamity Ops actually rewards mechanical patience. Cap your damage phases at 12 seconds, prioritize defensive perks, match your elemental damage, and treat every attempt ticket as an investment that requires zero wipes.





Comments